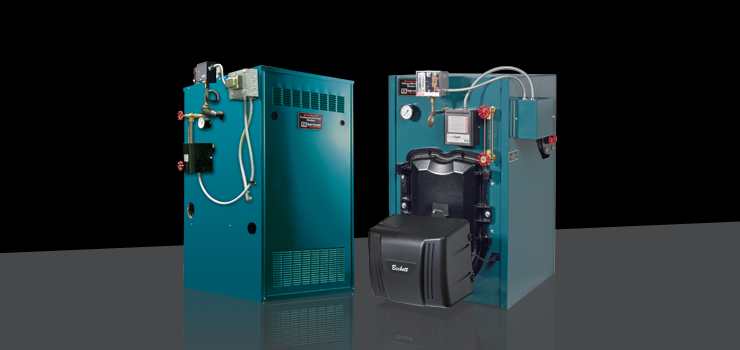
 U.S. Boiler’s technical service line receives many calls throughout the year from contractors, distributors, and our factory sales reps pertaining to multiple boiler installation scenarios. In fact, some of the Beck Tips I write about stem from these calls and questions. This month, I will address a call we receive a lot. The conversation goes something like this…
“I will be replacing a steam boiler tomorrow and am not as experienced with that as I am with hydronics. I am looking for some installation tips. What would you suggest?”
I suggest starting a simple strategy, which applies to standard one and two pipe systems:
Sale and Planning
- We must always start with proper boiler sizing. Do not complete a heat loss calculation for a steam boiler application or simply match the old boiler size. Size the boiler according to the required square feet of steam. To do this, you will need to complete a radiator count and measurement. If you measure the height of each radiator, count the total number of sections, and count how many columns or tubes the radiators have, it will be quite easy to choose the proper boiler size. See our Heating Helper book for radiator types and determining radiator steam requirements.
This is a good time to verify the radiators are level or have a slight slope to the drain side of the radiator and that they all have the same style radiator vent. This is also a good time to offer to replace all radiator vents.
- Size connected load only. If main piping in the basement is insulated, not running through cold crawl spaces, not installed underground to other areas, do not add anything to the heat load as a pick-up factor. If the main piping is not insulated, and the homeowner does not want to insulate, you will have to calculate the steam mains as a radiator. This will increase the boiler size installation cost. If you have questions on this, call us at 866-659-3927.
- Check all the main piping for insulation. You should include pipe insulation. Steam boilers should never operate without main pipe insulation. The main steam lines should be insulated with a minimum of 1” pipe insulation. Main pipes that are not insulated cause higher fuel bills, more water in the system due to increased condensation in steam mains, slower heating, and possible system noise issues.
- Measure the height of the water level. I usually measure the height of the water level from the ceiling down due to unleveled basement floors. You will want to try to maintain that water level with the new boiler.
- Check your “A” dimension. Measure from the ceiling down to the lowest steam carrying main. Deduct the measurement of the lowest steam carrying main from the water level measurement to acquire the “A” dimension. This “A” dimension should be a minimum of 28 inches. If not, the boiler could have operational problems and noises.
- Plan on re-piping the near boiler piping. Re-piping the near boiler piping should be completed in iron pipe. Any piping installed below the water line can be in copper. Be sure to ask the homeowner about the quality of heat and if the rooms are evenly heated. If you are installing a MegaSteam boiler, a near boiler piping kit is available.
- One pipe steam systems. Verify that there is a working large fast main line vented a minimum of 6 inches from the end of the steam main. This vent should be as high as you can get it.
- Wet returns. Wet returns that are close to the boiler are normally very dirty. Offer an option to replace at least 10 feet of wet return piping from the boiler. The customer may not want to, but when you remove the old boiler and show them the condition of the wet return, most homeowners will opt to replace it.
- Consider an Anode rod. An Anode rod will increase boiler life.
Installation
- Place the boiler high enough. Make sure to place the boiler high enough to keep the new water level close to the old water level and pay attention to the “A” dimension measurement.
- Pipe the boiler according to the I&O manual. Use proper pipe sizing from the boiler size chart.
- The boiler header should slope slightly down. The header should slope towards the equalizing loop.
- Hartford Loop piping. The Hartford loop piping should be piped with a wye fitting or close nipple to avoid noises.
- A Hartford Loop is not required when using a pumped return. Pump into the boiler return, installing a check valve and a square cock for flow restriction.
- Use the proper amount of boiler risers. Some smaller sized boilers can be piped to the header with one boiler riser, but larger residential boilers require more. Rule of thumb, two boiler risers are always better than one.
- Steam should always flow in the same direction in a header. This means there should never be a system riser between two boiler risers. All system risers should be piped after all boiler risers.
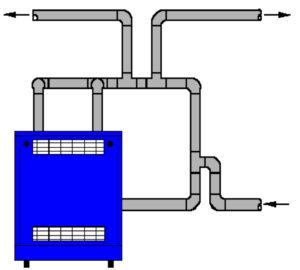
- Each system riser should be independent. Many system mains are piped together with one tee utilizing one steam riser. It is very important that each system main be piped back to the header with its own header tee. Other than the boiler header, you should never pipe a steam riser into the bull (side outlet) of a tee. See Figure 1.
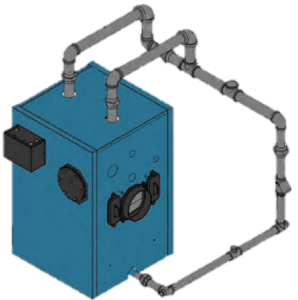
- A dropped header produces dryer steam. Although a dropped header is not a requirement, dryer steam moves faster, stays in a steam state longer, and has less of a chance for system noise caused by excessive water in steam mains. See Figure 2. If you are installing a MegaSteam boiler, the dropped header option is included with the near boiler piping kit.
- Install a water meter. A water meter will allow youto determine how much water is being added to the steam boiler. This will also give you a heads up if there are any system leaks. Water meters are sometimes built into the automatic water feeder.
Start-Up
- Heat boiler up. Avoid making steam.
- Skim the boiler. For directions on proper skimming, read my Beck Tips in the US Boiler Report from July 2015.
- Adjust your pressure control to proper settings. Cut-out should normally be 2 PSI or less. Cut-in should normally be a ½ PSI or less. Some steam boilers use controls that measure pressure in ounces.
- Check gas pressures per the boiler label and I&O manual.
- Place a mark on the gage glass. Mark where the new water level should be maintained, even with an automatic water feeder. Nothing takes the place of the homeowner checking and maintaining water level.
- See suggested water quality. See Figure 3.
Ron Beck is Outside Technical Advisor and Manager of Training for U.S. Boiler Company, where he’s been since 1998. Ron’s 34 years of experience in the heating industry include climbing the ranks of aHVAC company, from apprentice to service manager. Ron can be reached at: RBeck@usboiler.net


